
Build a course with AI
Generate a draft course from a topic or a document, then edit it, add slides and voiceover, set who can open it and publish.
AISKOOL can draft a whole course from a topic or a document, which you then edit and publish. This article covers the generator, the editor, access settings and what members see.
Generate a draft
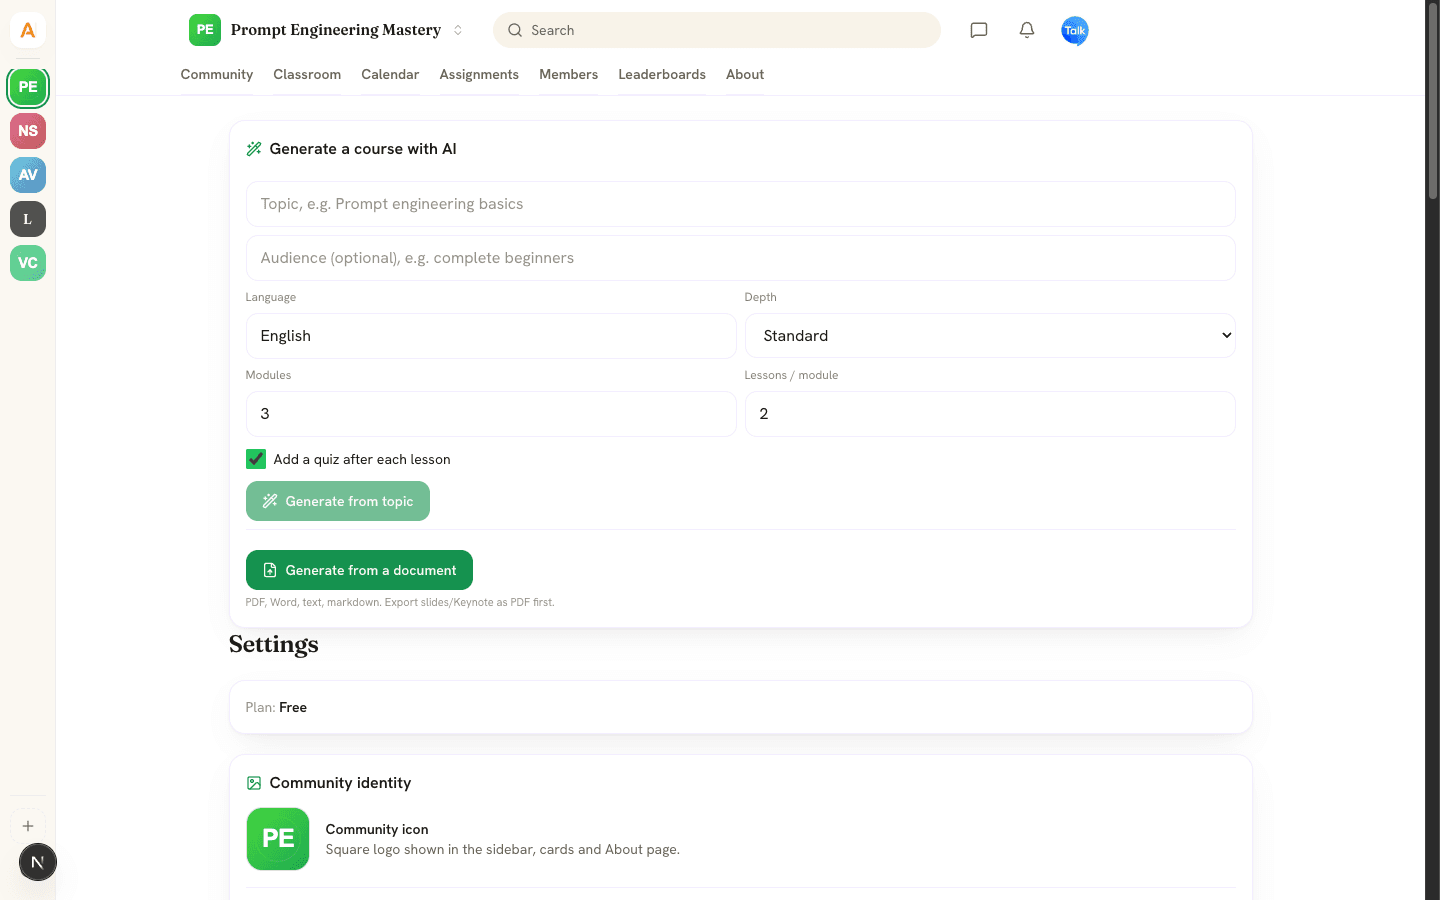
- Open Settings in the Manager workspace, or Community settings in your avatar menu. Scroll to Generate a course with AI.
- Type a topic, for example "Prompt engineering basics". The audience is optional.
- Set Language, Depth (Overview, Standard or Deep dive), Modules (1 to 12) and Lessons / module (1 to 10). The form starts at 3 modules and 2 lessons.
- Leave Add a quiz after each lesson ticked to get 2 to 3 multiple-choice questions per lesson.
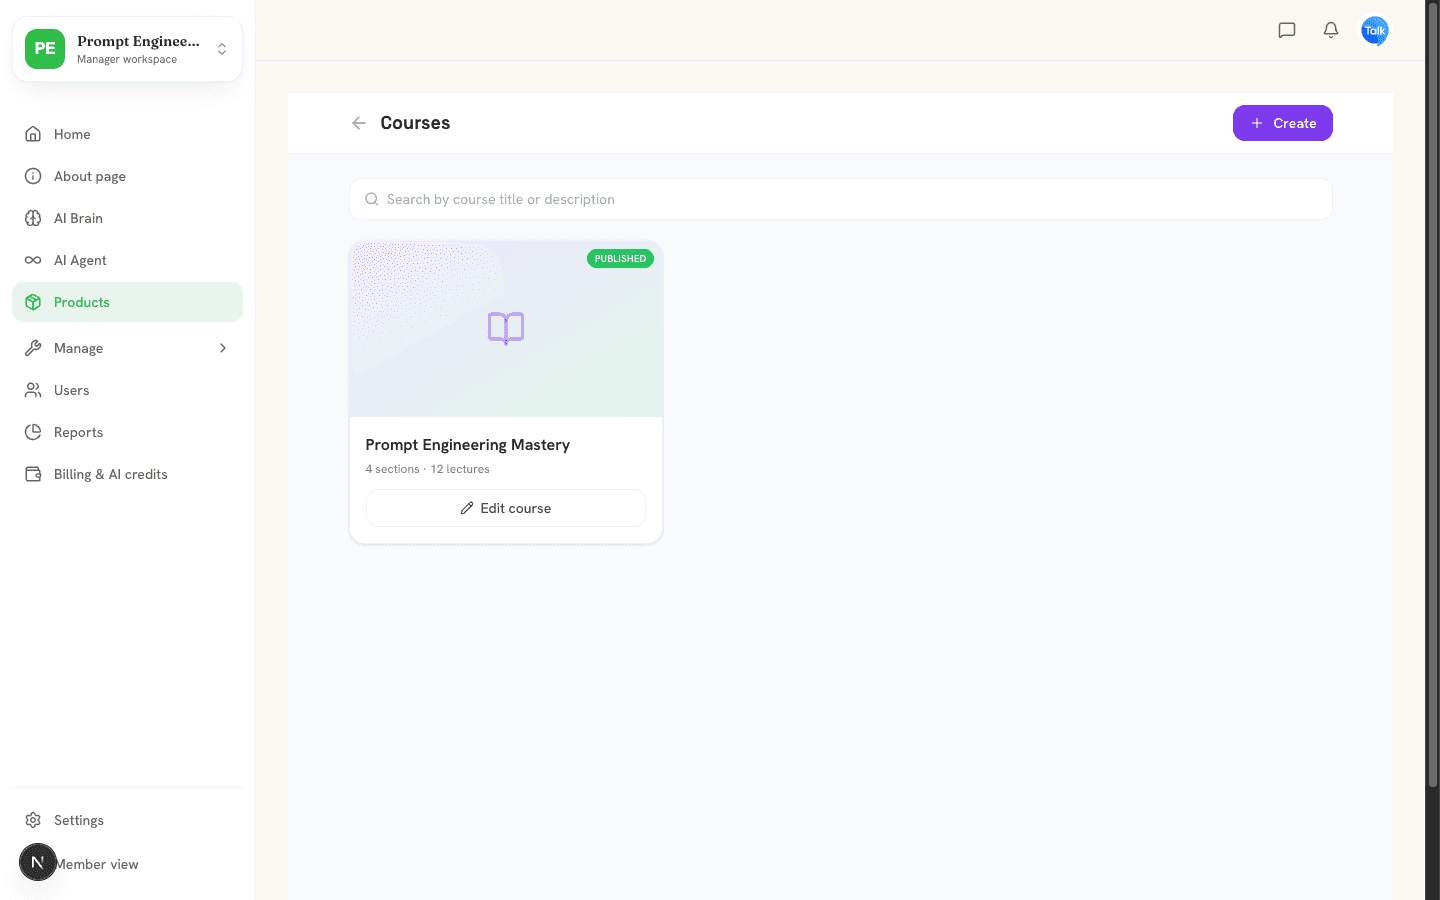
- Click Generate from topic. The course appears under Products as a draft. Read every lesson before you publish.
To start from a file, click Generate from a document. It reads PDF, Word, Excel, CSV, HTML, text and Markdown files, so export slides or Keynote as PDF first. With your own AI key, PDF, text, Markdown, CSV and HTML files run on your key and use no AISKOOL credits. Word and Excel files are read by AISKOOL's AI and use credits. The same options apply, except audience. Uploads can be up to 2 GB, but the AI reads at most about 300,000 tokens, which is hundreds of pages.
Edit and publish
Under Products, click Edit course on the course card.
The editor has three tabs.
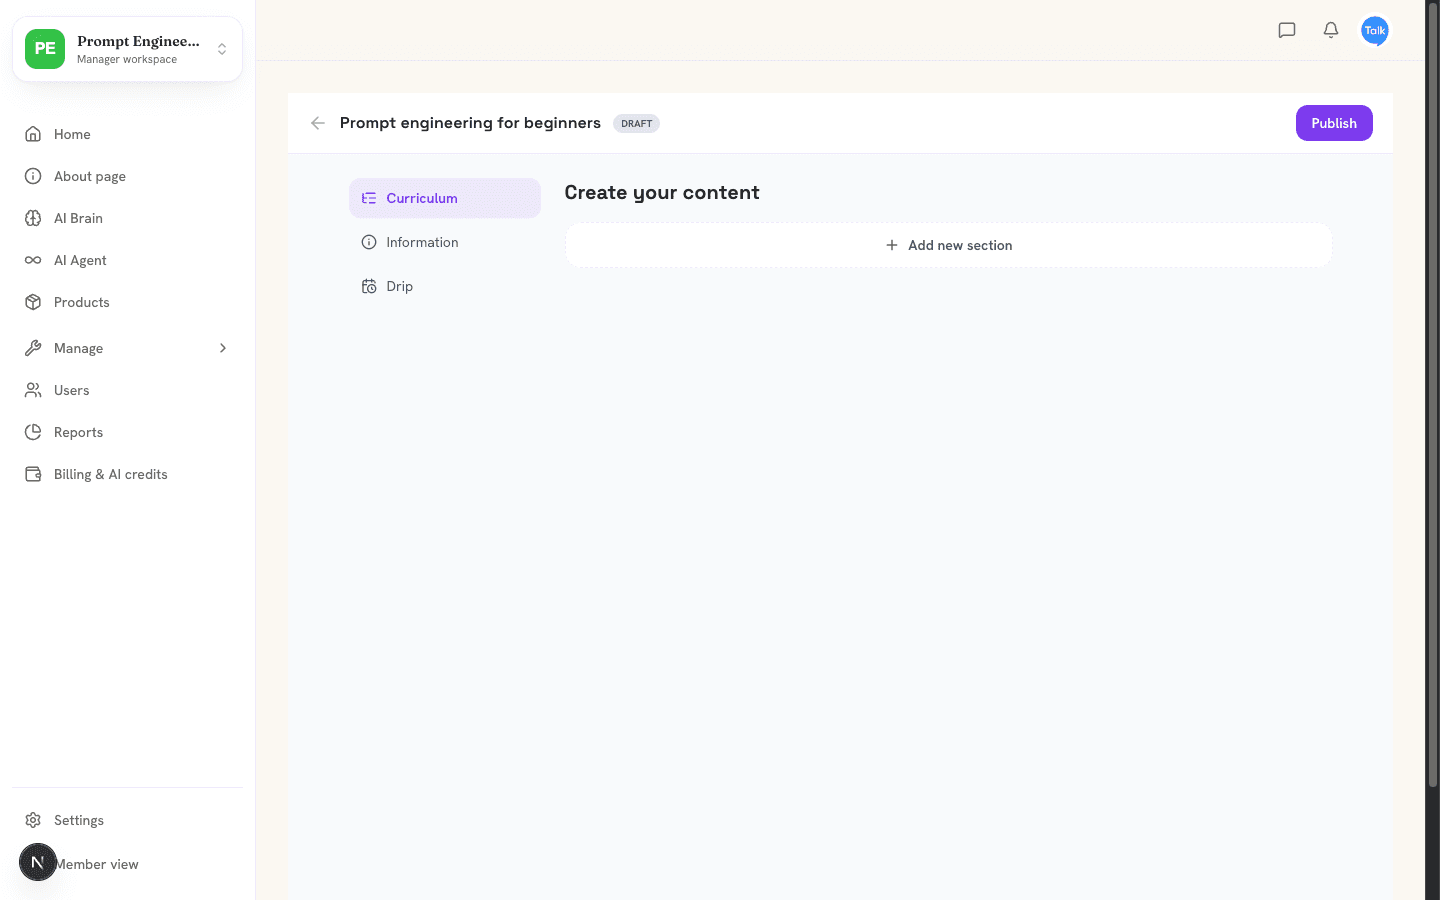
- Curriculum: Add new section, then Add chapter. A chapter is a lesson.
- Information: title, description, cover image, Who can access and the public sales page link.
- Drip: lock a section until a date and time. Members see Unlocks and the date.
Click Edit on a chapter to choose its type: Text, Video, Image, Slides, PDF / File or Quiz. Text uses Markdown (headings, bold, italic, links and lists). For video, paste a YouTube, Vimeo, Loom or Wistia link, or use Record a demo to capture your screen and voice. A chapter can hold up to 20 attached files, which members see under Resources. Lesson text is capped at 100,000 characters.
Click Publish when you are ready. Members see only published courses. Owners and admins also see drafts in the Classroom.
AI help inside the editor
- Text chapters: the AI row has Expand, Rewrite, Summarize, Continue and Translate (set the language box first). Each handles up to 20,000 characters.
- Images and covers: describe the picture, then click Generate.
- Slides: write the text first, switch the chapter to Slides and click Generate slides with AI. You get up to 8 slides. Narrate as video adds a voice to each one.
- Voiceover: Generate AI voiceover adds audio to a Text or Slides chapter, up to 18,000 characters (about 20 minutes). It uses one English voice.
The AI buttons replace the text in the box and save it straight away. Copy your original first if you want to keep it.
Access, sales page and certificates
- Who can access limits a course to subscribers of one paid tier. Other members see Subscribe to unlock. Moderators and above always get in. See Paid tiers and getting paid with Stripe.
- A published course has a public sales page at
/course/<id>. It shows the cover, description and outline, and an Enroll now button. Signed-out visitors go to the login page and come back to the course after they sign in. Signed-in members see Open the classroom instead. Open it from View public course page on the Information tab. - Members who finish every lesson earn a certificate. View your certificate opens a public page with Download / Print, LinkedIn, X and Copy link.
What members see
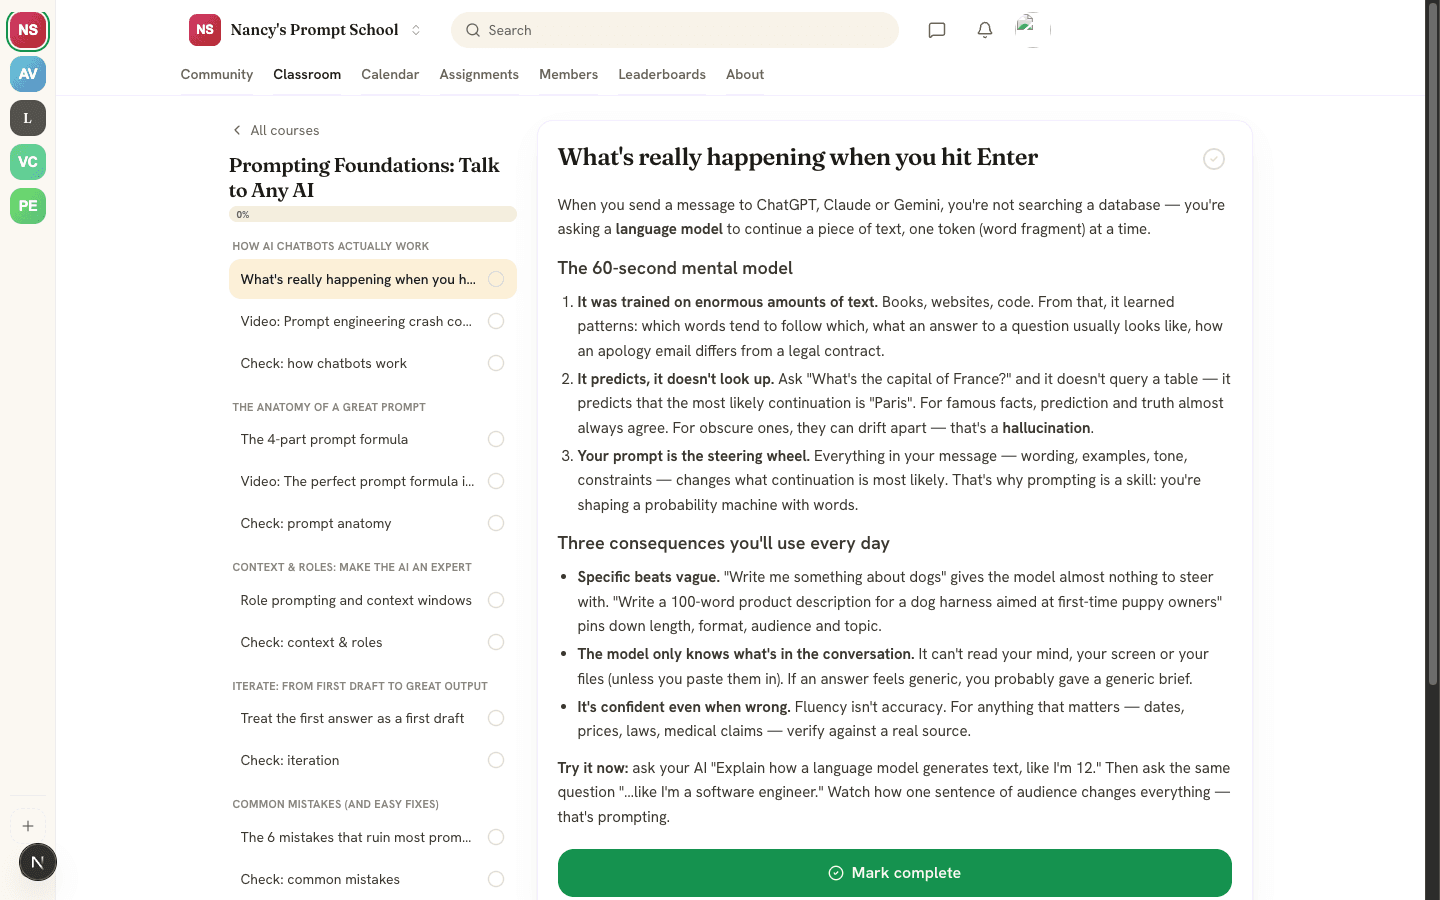
Members open the Classroom tab, pick a course and see sections and lessons on the left with a progress bar. They click Mark complete after each lesson, which earns 10 points the first time. A quiz lesson must be submitted first, and your AI host can add written feedback to the score.
What it costs
Generating, the AI buttons, slides, images and voiceover use your plan's monthly AI grant first, then your credit balance. When both are empty, the generator shows the out-of-credits message. Add credit or add your own key to continue. On a Word or Excel file, it tells you to add credits or upload a PDF or text file instead. See Plans, AI credits and bring your own key.
Frequently asked
Who can generate and edit courses?
Can I use my own AI key?
Why can't a member open my course?
Related articles
Your AI host: Brain and Agent studio
Teach your AI host with AI Brain, shape its personality in the AI Agent studio, and see what it does and what it costs.
Plans, AI credits and bring your own key
The three plans, how AI credits work, and how to run AI on your own key.
Paid tiers and getting paid with Stripe
Connect Stripe, create membership tiers, charge for joining or lock a course, and see how each payment is split.
Leaderboards, points and levels
What earns points, how the nine levels work, and where to find the 30-day and all-time leaderboards.